1.1 Introduction
Service-Now is an online ticketing system that
allows users to report IT issues and request IT services. The system keeps a
log of all activities and automatically emails status updates, allowing users
to track the status of an incident ticket or a service request that has been submitted.
1.2 Document Objective
This
Document provides an overview of the Service-Now user interface and covers how
to login and how to send an email from incident.
2.1 Process
2.1.1 – Logging In
You can log in to Service-Now from any device with
an internet connection using your ITIL license account.
2.1.2 - Login to Service-Now:
2.1.2 - Login to Service-Now:
1. Open a web
browser and go to https://service-now.com/nav_to.do?
2. On the Service-Now
login page, enter your username and password in the
Corresponding
fields, and then click the Login button (see Figure 1).

Figure 1 – Service-Now Login Page
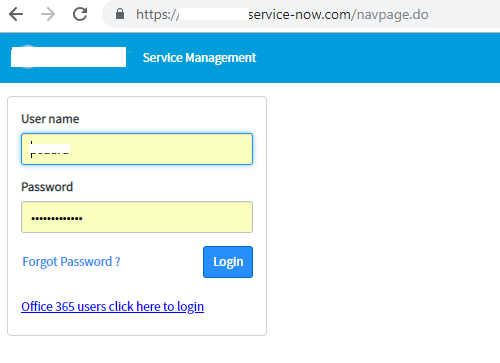
Figure 1 – Service-Now Login Page
2.2 - Overview of the User Interface:
The Service-Now user
interface is composed of three main sections (see Figure 2).


Figure 2 – Service-Now User
Interface
1. The Banner frame
is located at the top of the user interface and provides access to account
Settings, system
settings, and help.
2. The Navigation
bar is located on the left side of the user interface and provides access to
all available applications and modules, your favorites, and recently viewed
items.
3. The Content frame
is located on the right side of the user interface and displays homepages,
lists, or forms.
2.2.1 - Banner Frame
2.2.1 - Banner Frame
The Banner frame
runs across the top of every page and provides access to account settings,
system settings, and help (see Figure 3).
1. Clicking the logo displays the Self Service homepage in the Content frame.
2. The User menu
displays the name of the logged in user. Clicking the menu provides access to the
following options:
• Profile displays your user profile page
in the Content frame.
• Logout logs you out of the system and
returns to the login page.
3. Clicking the Help icon
opens the Help sidebar
on the right side of the user interface which includes a link to the official
Service-Now product documentation.
4. Clicking the Settings icon
opens the System
Settings pop-up window which allows you to customize the user interface and set
your preferences.

The Navigation bar (also called the Application Navigator)
provides access to all available applications and modules, your favorites, and
recently viewed items (see Figure 4, Figure 5, and Figure 6). You can use the Filter navigator box at the top of the
Navigation bar to quickly find an application or a module. As you enter text,
the bar shows only matching applications and modules. You can collapse or
expand.
The Navigation bar
by clicking the Minimize/Maximize Navigator icon
at the bottom of the
bar. In the collapsed view, only favorites are displayed and they appear as
icons.
2.2.3 - The Navigation bar consists of three tabs:
1. The Applications
tab, represented by a Storage Box icon
, displays all available applications and modules (see Figure
4). Each application appears as a section on the tab. All modules that an
application contains are listed below the application label. You can collapse
or expand an application by clicking its label. Clicking a module opens it in
the Content frame.
2. The Favorites
tab, represented by a Star icon
, displays items you have added as favorites (see Figure 5).
Any application, module, list, or record can be marked as a favorite. By
default, the Favorites tab includes a link to the homepage.
• To add a favorite for an application or a
module, click the Applications tab, point to the application or module, and
then click the Star icon
that appears on the
right.
• To reorder favorites in the list, click the
Favorites tab, click the Edit Favorites
icon at the bottom of
the Navigation bar, drag a favorite to a new location in the list, and then
click the Edit Favorites icon to exit edit mode.
• To delete a favorite, click the Favorites
tab, point to the favorite, and then click the Remove Favorite icon
that appears on the
right.
3. The History tab,
represented by a Clock icon
, displays items you have recently accessed (see Figure 6).
Items appear in chronological order from most to least recently accessed.

Figure 4 – Application Tab Figure 5 – Favorites Tab Figure 6 – History Frame
3.1 - Send Email from Service-now
1. Clicking on Incidents - In progress tab and select
one “Incident” ex: INC0021498


2. Click on dot icon
on the top right. By clicking on this you will find the
options as shown in below figure.

3. Now click on “Email” tab. It will navigates to Compose email page as shown in below.

4. Click on "Send" button. The Email will be sent.
3.1.1 - Compose Email Fields:
To - The main recipients of the email.
Enter a list of user email addresses separated by commas or white spaces. You
can also drag-and-drop data pills that contain email addresses into the field,
such as a User record. For example, if your action involves an incident record
and you want to send an email to the group assigned to the incident, drag the
[Assignment group] data pill from the data panel.
CC - Additional recipients copied on this
email. Enter a list of user email addresses separated by commas or white
spaces. You can also drag-and-drop data pills that contain email addresses into
the field.
BCC - Additional recipients of this email, who
are visible only to the sender (blind copied). Enter a list of user email
addresses separated by commas or white spaces. You can also drag-and-drop data
pills that contain email addresses into the field.
Subject - Subject of the email. You can enter text or
drag-and-drop data pills into the field.
Body
- The content of the message body. You can
enter text or drag-and-drop data pills into the field.
Note:
Flow Designer does not support the
${URI} parameter for creating a link to a record in the email message body.
Instead, consider inserting the information from the record in the email body
using data pills, or create a notification step.
Thanks & Regards,
Siddhardha R.
Thanks & Regards,
Siddhardha R.
Thank you Mr. Siddhardh. This is so clear and helped me a lot. looking forward to see many more like this.....
ReplyDeleteawesome information
ReplyDeleteThank you siddhartha.really useful blog
ReplyDeleteGood one Siddhardh
ReplyDeleteSuperb. Very easy to understand. Now am able to send emails through the servicenow portal. Awaiting for "report pulling" blog
ReplyDeleteIt's useful... Good blog.
ReplyDeleteExcellent siddhardha.
ReplyDeleteGo on.....
It's very clear and easy to understand.
ReplyDeleteThank you.
Good blog
ReplyDeleteGood blog
ReplyDeleteThank you Siddhardh, that's very useful and understanding...
ReplyDeleteIt is an impressive article. It is very useful. Thank you for sharing this with us...
ReplyDeleteServiceNow Training in Hyderabad
ServiceNow Training in Ameerpet
ServiceNow Training
Thanks for Sharing This Article.It is very so much valuable content. I hope these Commenting lists will help to my website
ReplyDeletebest servicenow online training
servicenow online training
top servicenow online training
Thanks for your valuable information very nice article. Keep posting.
ReplyDeleteservicenow course online
servicenow online training
This blog really helped, thanks for sharing
ReplyDeleteFull Stack Training in Chennai | Certification | Online Training Course | Full Stack Training in Bangalore | Certification | Online Training Course | Full Stack Training in Hyderabad | Certification | Online Training Course | Full Stack Training in Pune | Certification | Online Training Course | Full Stack Training | Certification | Full Stack Online Training Course
This information is really awesome thanks for sharing most valuable information.
ReplyDeleteServicenow Training
Servicenow Certification
Servicenow Now Learning
Servicenow Online Training
Servicenow Online Training in Hyderabad
Servicenow Developer Training
Servicenow Training in Ameerpet
Servicenow Course Online
Best Servicenow Online Training
Servicenow Developer Training Online
Great article,this blog looks awsome,keep sharing more content with us.
ReplyDeletethank you...
Servicenow certificationCourse
Very Nice article, Thank you for Your valuable info.
ReplyDeleteKeep Updating..
Servicenow Training in Hyderabad
Servicenow online Training in Hyderabad
Servicenow Training and placement in Hyderabad
thanks for sharing....
ReplyDeleteServiceNow Training
ServiceNow Certification
mmorpg
ReplyDeleteINSTAGRAM TAKİPCİ SATİN AL
Tiktok Jeton Hilesi
tiktok jeton hilesi
saç ekimi antalya
referans kimliği nedir
instagram takipçi satın al
metin2 pvp serverlar
İnstagram Takipci Satın Al
SMM PANEL
ReplyDeleteSmm Panel
İSİLANLARİBLOG.COM
İnstagram Takipçi Satın Al
Https://www.hirdavatciburada.com/
beyazesyateknikservisi.com.tr
Servis
tiktok jeton hilesi indir
üsküdar vestel klima servisi
ReplyDeletebeykoz bosch klima servisi
maltepe mitsubishi klima servisi
kadıköy mitsubishi klima servisi
tuzla alarko carrier klima servisi
tuzla daikin klima servisi
kartal beko klima servisi
beykoz lg klima servisi
beykoz alarko carrier klima servisi
Thank you for sharing such a great article.Looking forward to read more.Keep posting.
ReplyDeleteOracle Fusion Cloud CRM Training from Pune
Best OBIEE Online Training
Best Looker Training
Certified Scrum Product Owner Training Institute In Bangalore
Arcsight Online Training Institute from India